Add A Stylish Scrolling Sidebar Widget In Blogger
Last
night, when I was browsing for information about making blogger blogs
look more stylish and professional, I found a beautiful widget that will
scroll along the page as and when you scroll up or down. What attracted
me, is the gliding movement of the widget to display the important
links for your blog. You may use this widget to display some of the best
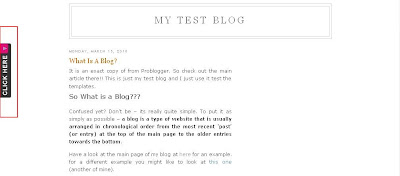
posts in your blog or some important links. Look at the red box in the
picture below. If you are still confused, please have a look at the demo
in my test blog by clicking here -

I am pretty sure everyone would love to add this
widget in their blog. There are lots of customizations with this widget.
For example, you may ask the advertisers to place their ads in this
widget or display your social networking links. The only disadvantage
is that, it will take a little bit of time to load since it works on a
JavaScript. Any way, let us get to our work by installing this stylish
widget in our blogger blogs.
1. Go to "Design->Edit HTML. Make a backup of your template before modifying the HTML by clicking on the "Download full template" link at the top of the page.
2. Search for the following line in your template. Use "CTRL+F" to fasten your search.
1. Go to "Design->Edit HTML. Make a backup of your template before modifying the HTML by clicking on the "Download full template" link at the top of the page.
2. Search for the following line in your template. Use "CTRL+F" to fasten your search.
<body>
3. Download the text document - Stylish Scrolling Widget For Blogger Blogs.
4. Now, open the text document, copy the entire code and paste it just below the line you searched in step 2.
5. Change the code that says "Your Link 1, Your Link 2 and so on" with the links you wish to display in your blog. You may even change the text "USEFUL LINKS" with some other name, which gets displayed in the widget on hitting the "CLICK HERE" tab.
(Note: For any other customization with this widget, please feel free to leave your comments and I will help you customize them as per your request.)
6. Save your template and view your blog. You will find the widget installed successfully.
I made this post as simple as possible. I hope you enjoyed this post. As I said earlier, feel free to leave your comments here. You may even add the codes using the "HTML/Javascript" option in the "Design->Add Page elements" page. So, just give this widget a try!!


No comments:
Post a Comment